
What Are Macrame Wall Hangings? A Beginner’s Guide
macrame wall hangings
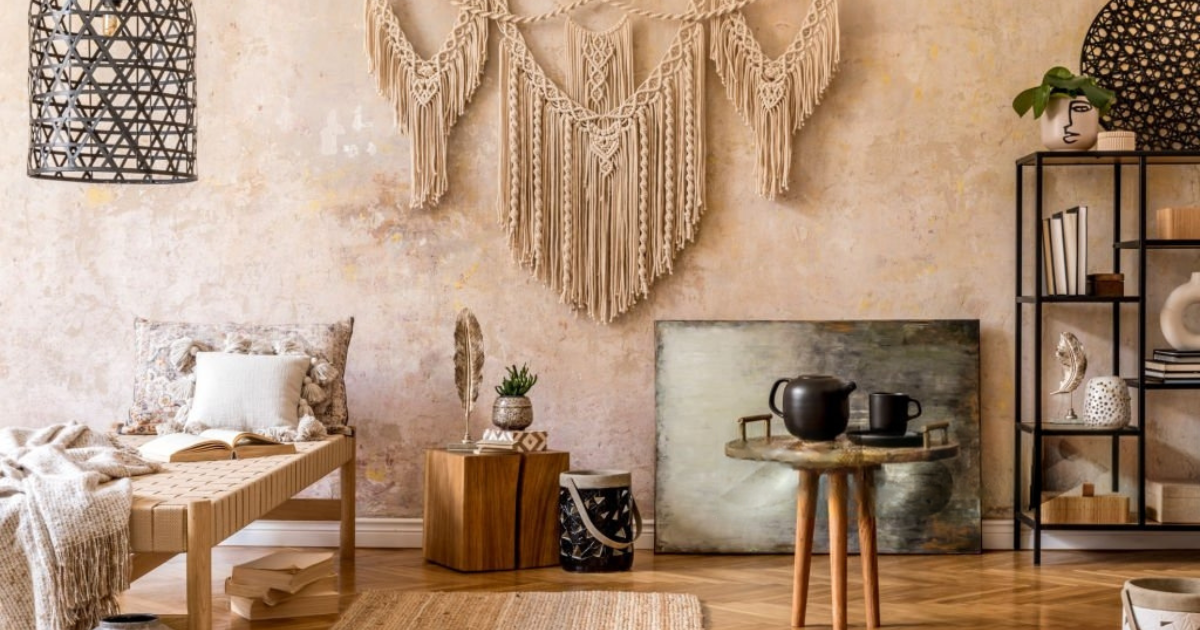
Ever walked into a room that felt cozy and welcoming? That’s what macrame wall hangings can do. They’re not just decorations; they connect your creativity to your space. If you want to add warmth to a wall or make something with your hands, this guide is for you.
Macrame wall hangings turn simple knots into beautiful art. You can use cords, dowels, and your hands to create them. They can be bohemian or geometric, making them uniquely yours. And the best part? You don’t need a lot of tools or a big space to start.
Key Takeaways
- Macrame wall hangings are decorative textiles created through knotting techniques, blending art and functionality.
- They’re a meditative craft accessible to all skill levels, using easy-to-find materials like cotton cord and dowels.
- These pieces add texture and personality to spaces like living rooms, bedrooms, or even patios.
- Learning macramé connects you to a centuries-old tradition while letting you express modern style.
- This guide breaks down steps and materials so you can start creating your first macramé wall hanging today.
The History and Revival of Macrame Wall Hangings
Macrame wall hangings have a long and interesting history. They have changed from being useful tools to becoming stylish decor. This shows why they are still loved today.
Origins of Macrame in Ancient Civilizations
Macrame started with Arab weavers making “migram,” fringed fabrics. Sailors used these knots to fix ship ropes. They shared their skills around the world.
By the 1800s, European nobles used macramé wall hangings to show off their wealth. They combined practical use with beauty.
The 1970s Macrame Boom
In the 1970s, macrame became a big part of bohemian culture. Some key trends were:
- Textured wall hangings with bold earth tones
- Handmade plant hangers became popular
- DIY kits were sold in craft stores
But by the 1980s, it faded away. That was until recently.
Contemporary Revival in Modern Home Decor
Today, designers are making macrame wall hangings modern and sleek. Here’s how styles have changed over time:
| Era | Primary Use | Style |
|---|---|---|
| Ancient | Repairing ship gear | Functional knots |
| 1970s | Bohemian decor | Earth tones and bulky knots |
| Modern | Statement wall art | Minimalist lines and mixed materials |
Now, macrame wall hangings fit well with both rustic and modern homes. They show how versatile they are.
Essential Materials for Creating Your First Macrame Project
Starting your easy macrame wall hanging journey is simple. You just need a few basic supplies. Let’s go over what you’ll need before you start:
- Macrame cord: Choose soft cotton cord (6mm-8mm thickness) for macrame how to wall hanging projects. Stay away from stiff materials that make knotting hard.
- Dowel or wooden bar: Pick a smooth 1-inch thick dowel from places like Michaels or Etsy sellers.
- Scissors: Get a sharp pair for clean cuts.
- Measuring tape: Use it to make sure knots are evenly spaced.
- Optional extras: S-hooks for hanging, wooden beads, or decorative rings.
A starter kit can cost under $20. Here’s a comparison of cord types:
| Type | Best For | Why It’s Great for Beginners |
|---|---|---|
| Cotton cord | Beginner projects | Soft texture makes knotting intuitive |
| Jute | Natural-themed designs | Easy to dye and holds shape well |
| Hemp | Rustic styles | Strong and readily available at craft stores |
When buying your easy macrame wall hanging supplies, check online stores like Amazon or specialty sites like Cotton Rope Co.. Look for pre-cut cord bundles to make measurements easier. Stick to natural fibers like cotton or linen for your first projects. Most craft stores sell 12-18ft cord lengths, perfect for small wall hangings. Start simple: you can always add beads or dyes later once you get the hang of basic techniques.
Understanding Different Types of Macrame Cord
Choosing the right cord material is key for your macrame wall hangings. Each type has its own texture and durability. Knowing your options helps you create what you envision. Let’s explore three main categories to help you choose.
Cotton Cord: The Beginner’s Best Friend
Cotton is great for beginners. It’s soft and holds knots well without fraying. Choose cords between 3mm to 6mm for different looks. Thinner cords work for delicate patterns, while thicker ones make bold statements.
Westex offers high-quality cotton that doesn’t tangle easily. This makes it perfect for your first projects. Remember to pre-wash cotton to avoid shrinkage later.
Jute and Hemp: Natural Texture Options
Natural fibers like jute and hemp bring an earthy feel to your macrame wall hangings. Jute has a rough, organic texture, while hemp is smoother and more durable. Both are great for rustic styles but need extra care.
They are stiffer than cotton, so you might need to practice more. Keep them in dry places to avoid mildew.
Specialty Cords for Advanced Projects
For more advanced projects, try specialty cords. Neon polyester blends add vibrant colors, while metallic-coated cords (like Artistic Twine’s gold-finished lines) add glamour. Recycled materials, like plastic-based “eco-cord,” are eco-friendly choices.
These options let you get creative but might cost 20–30% more than cotton.
| Type | Texture | Cost Range | Best For |
|---|---|---|---|
| Cotton | Smooth, pliable | $2–$8 per skein | Beginner projects, indoor decor |
| Jute/Hemp | Rough, natural | $3–$10 per skein | Rustic styles, outdoor use |
| Specialty | Varies (shiny, eco, etc.) | $5–$15 per skein | Customized macrame wall hangings, statement pieces |
Basic Macrame Knots Every Beginner Should Master
Learning the basics is key to making beautiful macramé wall hangings. Four essential knots are the foundation for any project. Practice each until you can do them smoothly.
The Square Knot Technique
Begin with two cords. To make a square knot:
- Place four cords side by side. Cross the left cord over the middle two and under the right.
- Pass the left cord through the loop you just made. Pull tight to secure.
This knot helps create flat, even designs. If your tension is off, adjust the loops before tightening.
Mastering the Half Hitch Knot
This knot is great for straight lines or edges. Here’s how to do it:
- Loop one cord over a central cord.
- Pass the working cord through the loop from below. Pull tight to secure.
Use multiple half hitches to create braided edges or textured bands.
Creating Diagonal Patterns with Diagonal Double Half Hitches
These knots make diagonal lines. Follow these steps:
- Pair cords and loop the first over a central strand.
- Change direction with the next cord for a diagonal pattern.
Pay attention to spacing to avoid gaps. This is crucial for smooth patterns in large designs.
The Versatile Spiral Knot
This 3D knot creates a twisted look:
- Hold three cords together. Wrap one cord around the others in a clockwise direction.
- Switch the wrapping direction to make a spiral.
It’s perfect for adding depth to corners or highlights in your wall hangings. Adjust the tension slowly to keep the twists even.
Try mixing these knots to make unique wall hangings. Begin with small practice pieces before tackling your final project. Regular practice will help you master complex designs over time.
Step-by-Step Guide to Your First Easy Macrame Wall Hanging
Are you ready to make your own easy macrame wall hanging? Follow this simple guide to make your knots into a beautiful piece. First, get your supplies:
| Material | Description |
|---|---|
| Cord | 16 strands of 4mm cotton cord (e.g., Macrame Essentials brand), cut to 8 feet each |
| Wooden Dowel | 12-inch untreated pine dowel |
| Decorative beads | Optional: 10-15 wooden beads for embellishment |
| Tools | Scissors and a ruler for precision |
- Secure the cords to the dowel using a lark’s head knot, evenly spaced 1 inch apart.
- Create a header row by tying square knots across all pairs, keeping tension tight.
- Alternate between half hitch knots and bead placements to form a diamond pattern (refer to the diagonal double half hitch technique from earlier steps).
- Finish with a final row of square knots, leaving 2 feet of cord below for fringe.
- Trim fringe ends evenly and seal fraying tips with a lighter flame.
- Tip: Mark cord pairs with clips to avoid confusion during knotting.
- Adjust knot spacing by ½ inch for symmetry.
- Test knot tension on scrap cord before starting your final project.
Hang your creation on a nail or command hook—congratulations, you’ve completed your first wall art! Visit our Design Ideas for Big Macrame Wall Hangings section next to explore scaling up your project.
Design Ideas for Big Macrame Wall Hangings
Expanding your macramé skills can lead to exciting new projects. Big macrame wall hangings can make a bold statement in any room. We’ll look at how to tackle larger projects while keeping them stylish and functional.
| Design Idea | Materials | Key Tips |
|---|---|---|
| Living Room Statement Piece | Cotton cord, silk accents, wooden beads | Use 4–6 dowels for stability; pair with minimalist furniture |
| Bedroom Headboard Alternative | Soft cotton, silk blends | Mount on a reinforced wall bracket; leave loose ends for flow |
| Outdoor Patio Accents | Hemp, coated polyester, UV-resistant cord | Secure with marine-grade hooks; avoid direct sunlight |
Living Room Statement Pieces
Make a big impact in your living room with bold designs. A big macrame wall hanging can be the centerpiece. Try layering geometric knots or using cascading fringes.
For added depth, use square knots in staggered rows. This creates a striking visual effect.
Bedroom Headboard Alternatives
Try a macramé wall hangings as a headboard instead of the usual one. Use flowing, textured cords to frame your bed. Make sure to anchor it to the wall with a strong bracket to prevent sagging.
Outdoor and Patio Decor
Bring the outdoors in with weather-friendly designs. Choose macramé wall hangings made from hemp or treated jute. Place them in shaded areas to prevent fading.
- Scale: Double the cord length for larger patterns
- Weight: Use heavier dowels for stability
- Installation: Test tension with a temporary setup first
Incorporating Color and Texture into Your Macrame Projects
Turn simple knots into eye-catching pieces by mixing colors and textures. Whether you’re making a big macrame wall hanging or small items, these tips help you create unique patterns. They make your macrame stand out.
Natural Dye Techniques for Cotton Cord
Move away from plain colors with natural dyes. Use plants like turmeric, indigo, or pomegranate peels to get vibrant colors. Here’s a simple guide to get the best results:
| Material | Color | Tip |
|---|---|---|
| Beetroot | Pink | Blanch first for brighter shades |
| Coffee | Brown | Reuse grounds for cost-effective dye |
| Onion Skins | Orange/Yellow | Simmer skins 30 minutes for rich tones |
Adding Beads, Wood, and Other Elements
Add beads or natural materials to break up patterns. Pick items that fit your design’s style:
- Wooden beads for rustic big macrame wall hangings
- Shiny acrylic beads for modern accents
- Driftwood accents for coastal-inspired pieces
Use lark’s head knots or slipknot loops to keep elements in place.
Ombre and Dip-Dye Methods
Make smooth color transitions with dip-dyeing. For a big piece, follow these steps:
- Prepare dye baths in light-to dark shades
- Submerge cord sections sequentially
- Rinse and dry to lock in colors
Try this on a big macrame wall hanging to show off patterns. Test dyes on small samples first.
Troubleshooting Common Beginner Mistakes
Mastering macramé wall hangings means learning from hiccups along the way. Let’s break down fixes for the most frequent slip-ups to keep your project on track.
- Uneven tension: If one side sags while the other lifts, pause and gently stretch loose cords. Pinch knots between fingers to tighten or loosen sections as you go.
- Too-short cords: Double-check measurements. For macrame how to wall hanging projects, start with cord lengths 2–3x the desired finished size to account for knots.
- Twisted cords: Use a clipboard or dowel to hold your work steady. Rewind tangled cords and retie knots from the error point backward.
- Lopsided fringes: Trim one strand at a time, holding scissors at a 45-degree angle. Test cuts on scrap cord first to gauge length.
- Slipping knots: Reinforce loose knots with a tiny dot of clear craft glue. Let dry completely before trimming excess cord.
Pro tip: Take photos as you go. Compare progress shots to spot issues early. If a section goes wrong, undo mistakes step-by-step—never yank cords. With these strategies, even troubleshooting becomes part of the creative process, turning challenges into polished macramé wall hangings you’ll love.
Taking Your Skills to the Next Level: Intermediate Techniques
Ready to make your macrame skills shine? These advanced methods will add a touch of elegance to your work. They’re perfect for those looking to create bold pieces, like a big macrame wall hanging.
Creating Geometric Patterns
Geometric shapes need precision. Begin by sketching your design on graph paper. This helps you plan where to place your knots. Use a ruler to ensure your cord lengths are exact.
Try mixing square knots and half hitches in a symmetrical pattern. For instance, create diamond or triangle patterns by spacing your cords evenly.
Incorporating Plant Hangers into Wall Art
“Functionality and artistry go hand in hand,” says fiber artist Lila Torres. “Adding pockets transforms wall art into living decor.”
Create macrame wall hangings with pockets for plants. Use sturdy cotton cord and knot loops at regular intervals. Fill these pockets with succulents or air plants for a lively touch.
Adjust the spacing of your knots and plants to achieve a balanced look.
Working with Multiple Dowels for Complex Designs
Use two or three dowels to add depth to your designs. Here’s how:
- Secure dowels horizontally across your work surface.
- Weave cords between dowels, alternating knot placements.
- Pull sections taut to form 3D peaks and valleys.
Try dyeing cord segments before knotting for color blocking. This technique works great for large projects, like a big macrame wall hanging.
Conclusion: Embracing the Mindful Art of Macrame
Creating macrame wall hangings is more than a craft—it’s a meditative practice. It blends tradition with creativity. The rhythmic motion of knotting becomes a calming ritual, offering a break from screens and daily stress.
Whether you’re starting with basic knots or exploring advanced patterns, each project grows your skills and confidence. This guide has shown how materials like cotton cord or jute, paired with techniques like square knots and diagonal hitches, turn simple threads into unique decor.
Your finished macramé wall hangings aren’t just wall art; they’re expressions of your style. Experiment with colors, textures, and shapes to make pieces that reflect your space’s personality.
Online platforms like Pinterest and YouTube host tutorials, while local workshops offer hands-on learning. Communities like Etsy showcase professional artists, but your journey starts with small projects. Every loop and knot builds mastery, connecting you to a craft practiced across centuries.
Handmade macrame wall hangings add warmth to homes, proving patience and practice transform simple cords into art. Your first wall hanging is just the beginning—explore geometric patterns, plant hangers, or bold color schemes to evolve your craft. Let tradition inspire your creativity, and let each project remind you of the joy in making something by hand.
FAQ
What are macrame wall hangings?
Macrame wall hangings are decorative pieces made with cord and knotting techniques. They are loved for their beauty and the warmth they add to any room.
Do I need to be an expert to create a big macrame wall hanging?
No, you don’t need to be an expert. Many big macrame wall hangings are easy for beginners. Start with simple projects and learn basic knots before moving on to harder designs.
What type of materials do I need for macrame wall hanging projects?
You’ll need macrame cord, a dowel or bar, scissors, and a measuring tape. You can also use beads and wooden rings to make your designs more interesting.
How can I learn macrame techniques for wall hanging projects?
Learn macrame techniques through online tutorials, like videos and step-by-step guides. These resources teach you basic knots that are key for making wall hangings.
What are some popular beginner knots for macrame wall hangings?
Start with the square knot, half hitch knot, and spiral knot. These knots are basic but essential for beginners.
Can I incorporate color into my macrame wall hangings?
Yes! Use dyed cords or add beads and wood to enhance your projects. Techniques like ombre and dip-dye can add depth and interest.
What should I do if I make a mistake while crafting my macrame wall hanging?
Mistakes like uneven tension or wrong cord lengths are common. You can fix them by adjusting knots or cutting more cord. Practice until you’re happy with your work.
Where can I find ideas for large macrame wall hanging designs?
Look for inspiration on Pinterest, Instagram, and crafting websites. Find designs that match your style and the feel of your space.
What are some advanced techniques I can explore after mastering beginners skills?
Try creating geometric patterns or adding plant hangers to your wall art. Use multiple dowels for more complex designs. These skills will make your macrame projects more advanced.


